FREE Delivery
When you spend £100+
When you spend £100+
Using an ID card template is one of the easiest ways to create professional-looking staff badges, visitor passes, or membership cards. Whether you're printing with a DTC or retransfer ID card printer, templates save you time and ensure consistency across your cards. In this guide, we’ll walk you through how to use ID card templates from design to print - step by step.
Start by selecting a template that fits your use case:
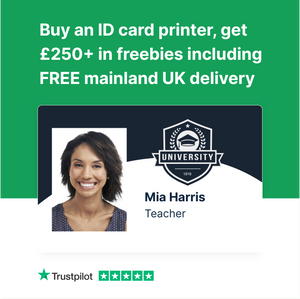
Staff ID template – name, photo, role, company logo
Visitor badge – name, date, time, access level
Membership card – member ID, name, barcode or QR code
You can find free templates online or use the ones included with your printer’s card design software (like EasyBadge or CardPresso).
Tip: Make sure the template matches your card size - the standard is CR80 (86 x 54mm)
Most ID card printers include or support design software. Simply open your template file in:
EasyBadge (free with many bundles)
CardPresso
ID Works
Adobe Illustrator or Photoshop (for advanced users)
You can then insert your logo, choose colours, and add dynamic fields like name or photo.
Edit the placeholders in your template with your own:
Company branding (logo, colours)
Employee or member details
Photo (upload or take via webcam)
QR code, barcode, or encoding fields (if needed)
If you're printing multiple cards, use the database or spreadsheet import feature to populate fields automatically.
Before printing, double-check your printer settings:
Card size: CR80 / PVC
Single or dual-sided
Ribbon type: Colour (YMCKO), monochrome, etc.
Print resolution: Use highest setting for sharp logos/photos
Reminder: Run a cleaning cycle if you haven’t printed in a while - debris can affect print quality.
Load your blank cards into the input hopper, select how many to print, and send the job from your software.
Check the first few prints for:
Alignment
Colour accuracy
Photo clarity
Text legibility
Make any tweaks to your design or settings as needed.
Save your final template for future use
Back up your data if using a database
If unsure about setup, use free support (we include it with every purchase)
We include free card design software and templates with all our ID card printer bundles – plus expert support to help you set it up.
{"one"=>"Select 2 or 3 items to compare", "other"=>"{{ count }} of 3 items selected"}